Tutorial: Basics of using Git and GitHub
Version control systems in general are good. They're good for keeping a long history of working revisions of a project or automatically merging code between multiple developers. This is not one of those Git vs SVN vs Mercurial comparisons, since I like Git and SVN and use both. For my personal projects, however, I prefer to use Git and GitHub. We'll just leave it at that for now.
This tutorial describes the absolute basics of using Git with GitHub, in as much detail as I have the patience to give right now. This includes setting up your repository, cloning, adding new files, committing, pushing, and pulling. A more detailed discussion of resolving conflicts, branching, forking, and other such things are outside the scope of this article.
Step 1 - Create an account on GitHub
First things first: create an account on GitHub. I'm going to take it for granted that you know how to sign up for an account, so I'll skip detailed instructions.
Step 2 - Create your repository on GitHub
After you've created a GitHub account and signed in, click the "New Repository" button in your main dashboard. The form for a new repository should look like the figure below:
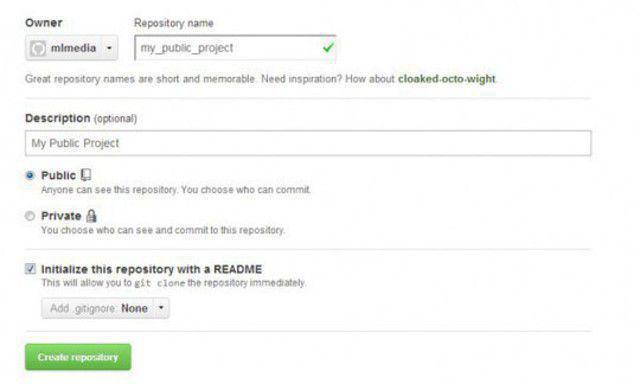
(Chances are the site will change, so the page may look different by the time you read this)
- Fill out the field for repository name. I used the name "my_public_project" as an example. You can optionally also fill out a description.
- Leave the "Public" option selected. If you only have a free account, then you can only create a public repository. Private repositories are for paid accounts only. Since we are not going to create your super-secret masterpiece next-coming-of-Facebook billion-dollar project right now, we will only use this to create a demo public project for learning purposes only.
- Check the "Initialize this repository with a README" box.
- I usually don't bother adding a .gitignore file, so let's ignore it for now.
- Click the "Create Repository" button.
If there are no errors, you should be taken immediately to the project homepage. This is where you can see the entire repository and track commits, add and remove collaborators, post issues, and so forth.
Step 3 - Set up Git
Next step is to set up Git on your computer. Since there are many instructions here depending on your platform, I'm going to pass the buck and send you to the instructions on GitHub:
https://help.github.com/articles/set-up-git
I understand now that GitHub has a native app, but for the purposes of this tutorial, you should set up Git itself with the Git Bash. The normal command line will not work. Other command line tools like Putty.exe will not work either.
Step 4 - Navigate to the directory that will contain your project
Open the Git Bash program installed in Step 3 above and navigate to the root directory that will contain your project directory. Note that the clone command in Step 5 will automatically create the project folder.
cd /path/to/your/project/root/directory
In this example, I will navigate to the ***HTDOCS ***folder in the XAMPP installation - the location I often use for the web projects I develop locally:
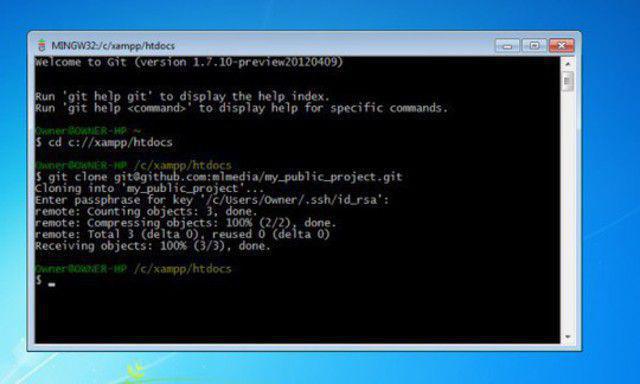
cd c://xampp/htdocs
Step 5 - Clone your project repository
Clone the project repository you just created at GitHub with the clone command. You will only have to do this once:
git clone git@github.com:your_username/repo_name.git
For the example above, I will use the command:
git clone git@github.com:mlmedia/my_public_project.git
You will be prompted to enter your password (NOTE: the cursor will not move when typing in your password). This will be your GitHub password that you created when you registered with GitHub. You should then see the screen like the one below.
Step 6 - Create a file to test
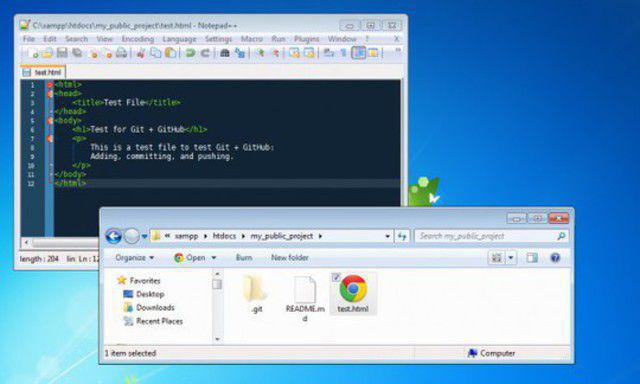
Enter your new project directory. You will see the*** README.md*** file that was automatically created with the repository. You may also see the hidden .git directory. Do NOT delete it.
Create your test file in the project directory. In this example, create an HTML file called test.html. Add some generic HTML using your favorite text editor and save the file as shown below.
Step 7 - (Git) add your new file
Using Git Bash, navigate into your new project directory by using the cd command:
cd my_public_project
Now use the git add -A command to add your new file. This will automatically add all new files in your project directory, including the test.html file we just created.
git add -A
Step 8 - (Git) commit your new file
To commit your file to the Git repository, type in the following command:
git commit -a
This automatically commits all updated files, including new files, to the local repository. After clicking the Enter button, you will be directed to a dialog to enter your commit message.
Press the Insert button to enter new text and write a new message. In the example below, I wrote "New test file added." Without a commit message, the commit will fail.
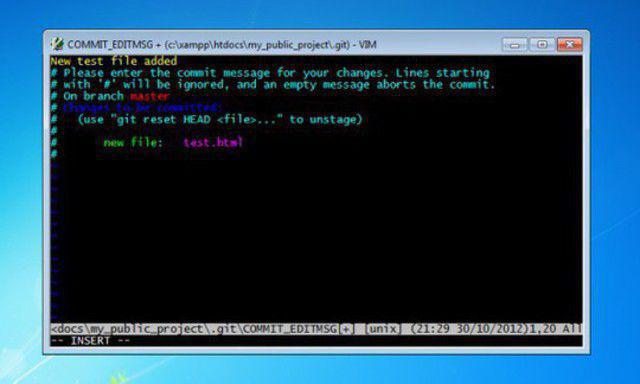
When finished, press the Escape (Esc) button, type a colon with an X (":x"), and then click the Enter button. This will exit the commit message dialog and return you to the Git Bash command line.
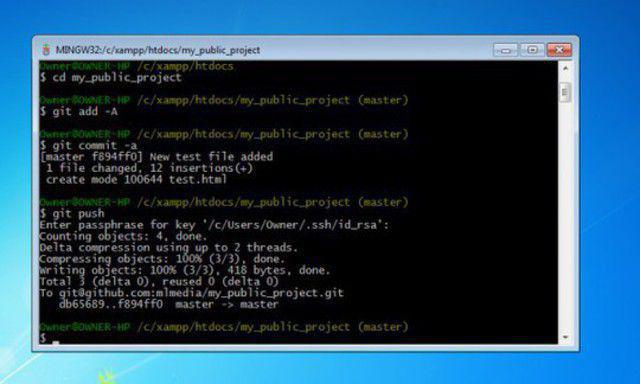
Step 9 - (Git) push your new file to the master repository
In Step 8, you committed the file locally to the repository on your computer (in that hidden .git folder). Now we want to push those changes to the master repository - the repository hosted on GitHub. Use the command below to push the file:
git push
Enter your GitHub password when prompted. Again, the cursor will not move when typing in your password.
When finished, you should get a similar success dialog as shown in the figure below.
Step 10 (optional) - (Git) pull from the master repository
When collaborating with other developers, you will have to pull the changes from the master repository that they pushed. To test how this works, have a friend follow the steps above with a new GitHub account, but skip Step 2 where you create the repository and move directly to cloning the original my_public_project repository. Also, instead of Steps 6 and 7 where you create and add a new file, simply edit the test file already in the repository. After saving new changes, use the pull command:
git pull
The tutorial above should get you started with the basics of Git and GitHub - two powerful tools for collaborative, version-controlled project development. To read more about resolving conflicts, branching, forking, and other features of Git, visit the GitHub Help section and GitHub Training section.